Friday, September 12, 2014

Snowskin Mooncake with Red Bean Paste


First attempt in trying to make Snowskin Mooncake, and it is a success! I'm a happy girl!
It still needs improvement, but I'm there soon!
The taste and method is correct, just it needs more "refrigerator" time. Remember to put in the fridge for at least 2-3 days before consume, it tastes even better and firm after few days in the fridge. Of course you can eat it right after you make it, it will have the texture of "muachi".
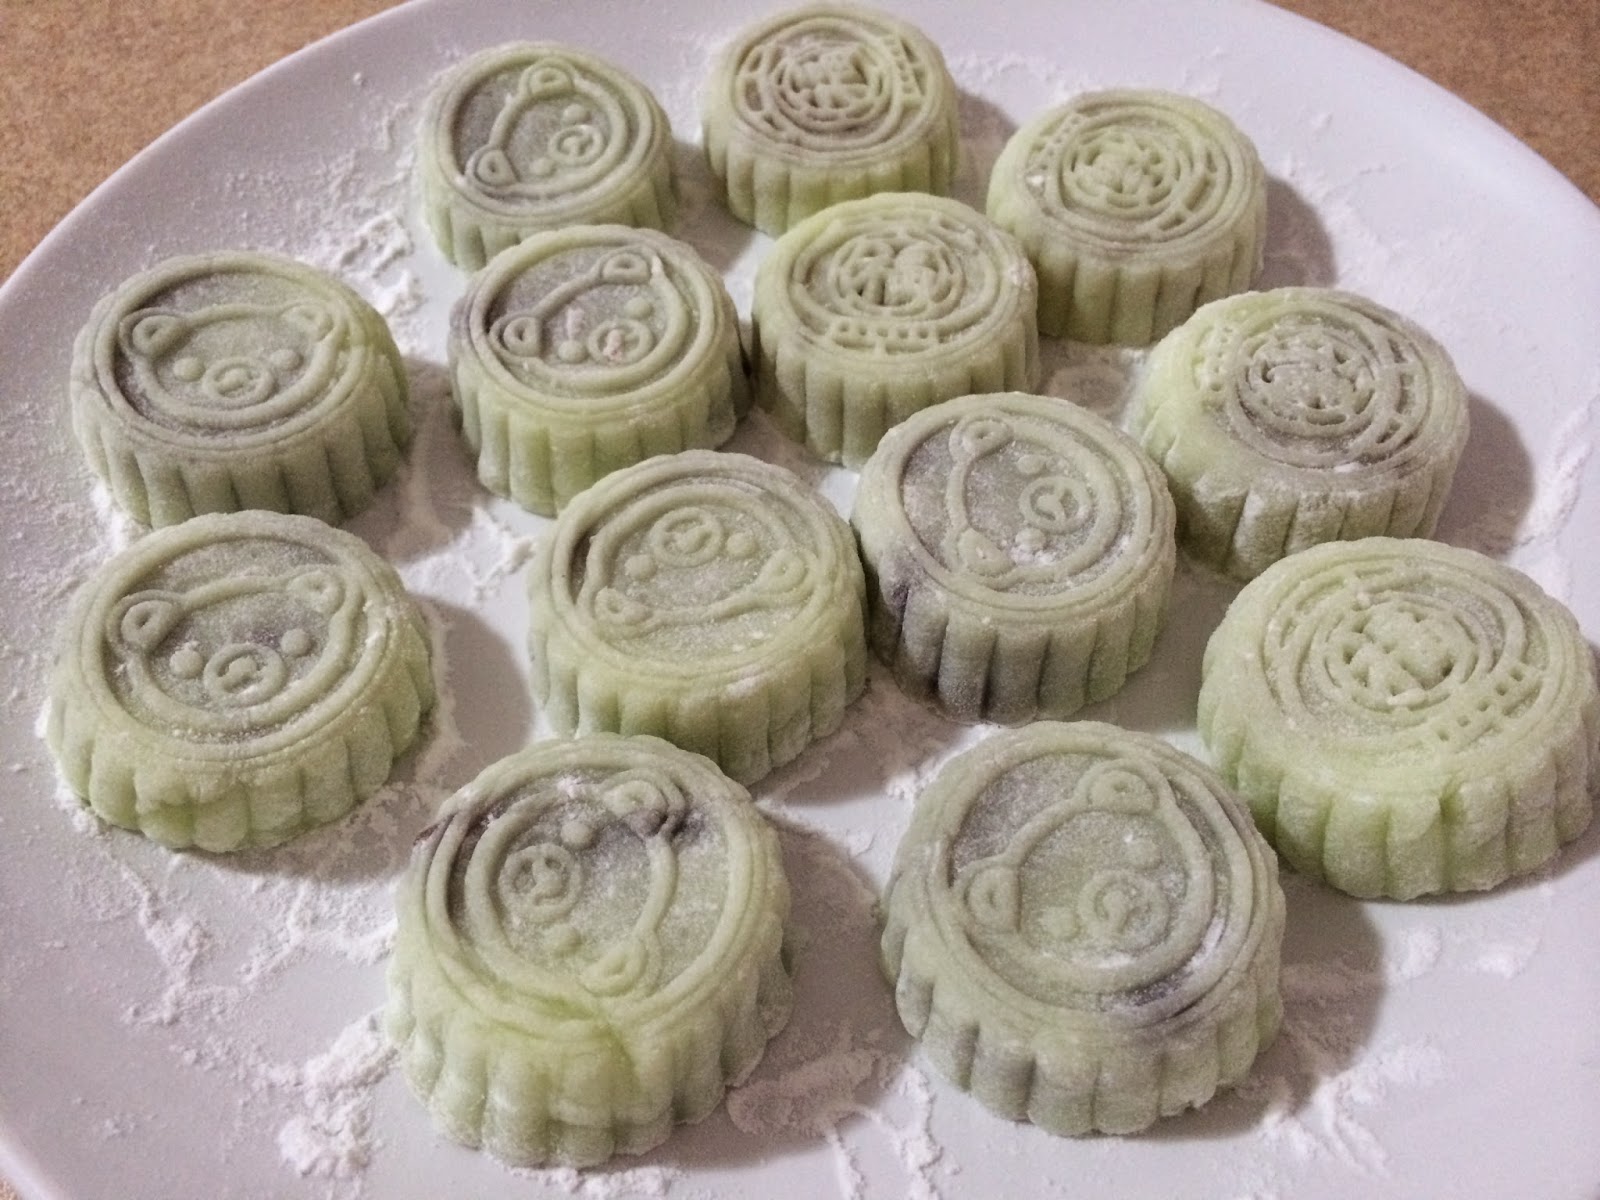


Ingredients:
(adapted from Nasi Lemak Lover)
110g cooked glutinous rice flour (koh fun)
110g powdered sugar
40g vegetable shortening
140g cold water (must be cold water)

colored gel/paste (I use green and pink, the lighter green is pandan extract)

red bean paste


Steps:
1. Mix rice flour and powdered sugar. Rub in the shortening. Add in the cold water and mix with hand till all combined. Put drops of colored gel into the dough after divided them into three portions.
2. Divide them into balls and flatten them. Wrap around paste and make into a ball. Coat with cooked rice flour to prevent sticking to the mold. Use mooncake mold to make shapes. Done!
3. Enjoy! =)


Simple & Easy Banana Cupcake


Another banana recipe again! I made many banana cake recipes because there are always leftover bananas that are only waiting to be thrown away. Also, banana cake is my boyfriend's favorite among most of my baking. He does not even touch the real banana fruit, but if it is made into cake or any other desserts, he loves them. How weird is he!? So I tend to make healthy banana cake recipe for him, omit most of the oil if possible. But, oil makes banana cake YUMMY!

Ingredients:
1 riped banana, mashed
1 egg, beaten
20g vegetable oil
10g sugar (omit this if your banana is super-duper riped; the banana in this form will be very sweet)
80g cake flour
1/2 tsp baking powder

Steps:
Beat in ingredients in this following order. Egg, sugar, oil, mashed banana, cake flour & baking powder. Put into pre-heated oven at 350 F for  12-15 minutes. Cool on wire rack.

You can eat while it's hot, just be careful not to burn your hands, mouth and tongue. LOL. It has a very nice fragrant smell of the banana. The house seriously smells divine! Love it!


Haha, too boring, so I dusted two of the cupcakes with cocoa powder using my snoopy and bear utensils. Lovely!


The inside of the cupcake is really moist and nice. Not very sweet at all, and not oily. Very nice! haha.. I love the "black thing" inside the cupcake. It proves that it is banana cupcake indeed.

Happy baking =)

Microwave Chocolate Banana Cake Doughnuts


Ignore the cupboard, the ketchup bottle, the wooden spoon at the back. My photography skill is yet to be improved. LOL. This is a very cute little treat I made out of a microwave oven. It is actually cake doughnut topped with colored glaze and sprinkles. It tends to harden very quickly since it is made out of a microwave oven. It is delicious when it comes out straight from the microwave oven, very soft. However, tr to consume it within 30 minutes to an hour. It depends on the weather as well. SO try to make in small batches unless you have many to feed.

Ingredients:
90g cake flour
60g milk
30g sugar
1 egg, beaten
15g cocoa powder
1 riped banana, mashed
25g vegetable oil

oil (for coating the mold)
sprinkles
powdered sugar
water
colored gel paste

Steps:
Mix all ingredients together till smooth and runny, and pour into the oil-coated mold. Microwave for 1 to 1 and half minute. Serve while still hot.

***** ALERT! I am using a Daiso Japanese bought product which is made out of microwave safe product. Do not use any aluminium or any NOT microwave safe product in the oven. It will explode. So be very careful! Please look at the instructions before you put anything into the microwave oven or oven!


Sorry for the mess..>.<...

Enjoy baking =)

Whipping Cream Hokkaido Cupcakes

Lately I have been posting photos of the baking projects that I have done in May before the M.I.A period. Forgive me for those lengthy posts in one day. LOL. This is one of the baking project, Hokkaido cupcake that is made with whipping cream and also filled with whipping cream/ topped with whipping cream. It is a sinful treat, since I replaced the milk with whipping cream to make it creamier. >.<

Ingredients:
recipe here
(I replace the milk with whipping cream)

You also can see the big dollop of whipping cream that I piped on top. It is really yummy although I am not a whipped cream lover at all. A little to me is fine. To those who are whipped cream lovers, definitely a treat for you!


Happy Baking!=)

Thursday, September 11, 2014

Lemon Blueberry Yogurt Tiramisu


I have always wanted to try tiramisu with other flavors, and also with yogurt instead of mascarpone. I made it and I am not very happy with the looks of the tiramisu. The taste can be better and sweeter. This tiramisu is a little sour, at least to me. The only pro for this tiramisu is the low fat, low calorie and high in nutrition. I use greek yogurt with fresh lemon and lemon juice, and fresh blueberries. I am thinking it is the freshness of the blueberries that made the tiramisu tasted sour because it is indeed very tart. Next time I will increase the sugar a little so that the taste will not be that sour. Haha... =D

Ingredient:
10-12 ladyfingers (depends on the size of your container)
plain greek yogurt
1 lemon zest + 1 lemon juice
blueberries
50g sugar (use more, maybe 100g sugar)

Steps:
Just prepare ingredients above according to the size of your container, and clean everything before use.Stir the greek yogurt till little runny/smooth. Cook the lemon juice and sugar till dissolve. Let it cool a little. Assemble the tiramisu with ladyfingers soaked lemon syrup, then yogurt, then blueberries, then lemon zest. Repeat till full. Finish with lemon zest. Refrigerate it before eating. Top with extra blueberries before serving, it is optional.


This tiramisu is very tart. If you like sour taste, then this is the one, healthy and fresh!

Happy eating =)

Egg-Free Doraemon & Dorami & Chipmunks Butter Cookies


Sooooooooooo Cute! I love cute stuffs if you have read my blog from the start, then you'll know it. I cannot resist cute things (food, toys, etc), and baking! It is just divine! Doraemon is one of my favorite childhood manga. Making it into cookies just make everything looks better! Chipmunks here is very cute too! Look at the details the cookie cutter made, very nice! Superb! Haha... Forgive my "High-ness" here, too happy, although it is a baking project that I have done in May. No time to post it.

The ingredient and steps are the same as my previous "Elmo" butter cookies. I will put the link here.
Recipe here


Happy baking!

*I will show you my collection of cookie cutter soon. Stay tuned to my blog posts. =)

Hello Kitty Fondant Face Cake

Hello all! I am so sorry for not updating my blog for almost 3 months. I will try to update more posts in the future. =) I have been back to my country and spent precious time with my family, was so happy till almost refused to come back to study. At least foods will help me to stay as happy as I want. =)

Below is a Hello Kitty Face Cake made out of fondant, that I have made for my friend's birthday. She is a Hello Kitty fans, so I thought this cake would be perfect for her. =D

The cake is a basic chocolate sponge cake recipe, or you can use chocolate box cake mix, it is the same. The cake pan is a Hello Kitty cake pan that I bought from Amazon. It is absolutely nice to use, easy and simple. However, be careful when you use this pan, because the edges is kinda sharp. Do not allow your children to go near it. I actually cut myself a little. >.< Then, the fondant is a white vanilla flavored fondant, and I mix the color myself. The yellow nose and red bow is mixed with edible food gel from Wilton. Then, the chocolate whisker and eyes are actually made from cocoa powder+fondant. It is like building a clay toy, very easy and fun. It is just that time is needed to do this. Patience is needed.


The cardboard is a DIY from cereal box. I'm so happy that I actually create a cake board from the recycle items.

Happy baking =)