Tuesday, September 16, 2014

Mini Checkerboard Cookies


Checkerboard cookies is always on my to-do baking list. Here it goes. This is a failed one actually, cos it has only 4 instead of 9 combination. I changed it in the beginning because my dough fail to stick. It will only stick to 4, 4 it is. Mini checkerboard cookies then. Haha. =P

Ingredients:
"Black" Dough:
60g butter
30g sugar
1/2 egg
20g milk
90g cake flour
20g cocoa powder
1 tbsp salt
1 tbsp vanilla extract

"White" Dough:
60g butter
30g sugar
1/2 egg
20g milk
110g cake flour
1/2 tbsp salt
1 tbsp vanilla extract

Steps:
1. Beat the butter, sugar and egg till combine. Add in milk and then the dry mixture and mix till combines. It is the same for both dough. Shape each dough into rectangular log shape. Wrap with cling wrap and put in the freezer for 1-2 hours. (Is a MUST!)
2. Take it out and cut into 4 square small long logs. Assemble alternately with one black dough and one white dough (as seen in the picture above). Wrap with cling wrap again and put in freezer for another 1-2 hours.
3. Preheat oven to 350F. Cut the firm cookie dough into 1-inch cookie, and place on baking sheet. Bake for 15-20 minutes. Be careful not to burn the cookies.
4. Cool completely on wire rack and enjoy!


The shape is not very pretty, because I did not push the dough against each other firmly, so it shows a little broken. Be sure to push them towards each other to form a nice, clean checkerboard cookie dough before putting it into the freezer at the second time.

Happy baking =)

EGG-FREE "Winnie the Pooh" Honey Lemon Cookies


Eh.. is that winnie the pooh? Yes it is! It makes me wanna eat all of them! It is a no egg honey lemon butter cookies that I adapted from ochikeron. Ochikeron is a very talented baker. I found her on youtube. She makes very easy and yummy desserts.

Ingredients:
The recipe is at the link below:
recipe
(just add 2 sliced lemon soaked in honey, and 2 tbsp of honey to make it even more sweeter.)

Imprint the winnie the pooh cookie cutter on top of the rolled out cookie mixture.


OOPSIE.... It is at the wrong direction, but still cute. Haha..=D

Happy Baking =)

Chocolate Marshmallow Whoopie Pie


Chocolate marshmallow whoopie pie........... YUMMY! Easy and yummy! Best combination!

Ingredients:
100g butter, melted
100g milk
200g cake flour
100g sugar
20g cocoa powder
2 tbsp baking powder
20-30 mini marshmallow (or more)

Steps:
1. Preheat oven to 350F.
2. Melt butter and mix with milk. Add sifted dry mixture into the wet mixture. Mix well. The mixture shows a slightly doughy texture. Put into piping bag. Pipe onto parchment paper on cookie sheet.
3. Bake for 8-10 minutes or the surface of the whoopie pie spring back when touched. Cool on wire rack.
4. Place mini marshmallow on top of one side of the whoopie pie. Microwave for 5-8 seconds, and quickly take it out. Caution that it is hot. Place another whoopie pie on top of the marshmallow. Squish it down and it will stick. Cool and enjoy!


Very simply and yummy, anyone can do it. The texture of the whoopie pie is very cake-like. Chewy and not crunchy. Divine!

Happy baking =)

NO EGG Chocolate Banana Cupcake


Sooooo cute! I think that once you add something cute onto any foods, the results is often amazing! I love cute things, so cute things make me want to eat more (is this a good thing or a bad thing? LOL).
These cute picks were purchased from bentoUSA.

This is the link:
http://www.allthingsforsale.com/

This is a simple chocolate banana cupcake without egg. I have run out of egg in my pantry so I made one without eggs. The result, to me is good. The cupcake is moist and fluffy. However, I think not all people will like it because egg make it fluffier. But, I love anything with banana in it. =P

Ingredients:
2 bananas, mashed
25g sugar
30g vegetable oil
100g milk
120g cake flour
1 tbsp baking powder
1 tbsp cocoa powder
walnuts(optional)

Steps:
1. Preheat oven to 350 F.
2. Mix in egg, oil, and sugar till combine. Add in mashed bananas and milk.
3. Mix dry mixture till all well-combined then stop mixing. Stir walnuts in gently.
4. Scoop batter into liners till 3/4 full. Bake in oven for 20-22 minutes or toothpick inserted comes out clean. Cook completely on wire rack. Decorate as desired.


I like the eye pick and the rilakkuma pick, very cute!

Happy baking =)

Healthy Oatmeal Raisin Cookies


Very yummy oatmeal cookies! I adapted this from a youtuber named "hockie", a Japanese mother who has two cute kids. The recipe is easy and healthy. I made some changes onto her recipe though. Hope you like it. =D

Ingredients:
3 tbsp vegetable oil
3 tbsp mango juice (any juice is fine)
3 tbsp honey
3/4 cup raisins (more is fine too)
150g all-purpose flour
1 tbsp baking powder

Steps:
Mix all till combine. Bake in preheated oven of 350 F for 15-20 minutes. Cool on wire rack.

Very easy recipe and also healthy. No egg & no milk. You can add in any nuts if you like too. =)

Tips:The batter is very sticky, so handle carefully. You can put some flour onto your hands first before you scoop onto the baking sheet.


Happy baking =)

Blueberry Jam Quick Bread


Another blueberry baking project using my homemade blueberry jam. This is a blueberry quick bread. It has the textures of a cake and a bread. It does not require any yeast, thus make this bread easy and quick. It has a nice smell, and it is low in sugar as well.

Ingredients:
1 egg
80g sugar
150g all-purpose flour
60g vegetable oil
60g milk
1 1/2 tbsp baking powder
1/2 tbsp salt
100g blueberry jam

Steps:
1. Preheat oven to 350F. Grease a loaf pan with oil or butter or cooking spray. Line a parchment paper at the bottom of the pan.
2. Beat egg, sugar and oil till combine. Mix in milk. Add in the dry mixture and stir till well-combined.
3. Pour the mixture into the loaf pan and add in the blueberry jam on top of the batter. Use a knife to swirl it.
4. Bake for 45-55 minutes or a toothpick inserted comes out clean. Be careful not to burn the top of the cake. Mine is slightly burnt, but still edible.
5. Cool completely on wire rack and enjoy with more blueberry jam on top or other jams.


It is very moist and very good for breakfast. Easy to make and healthy. So...........
Happy baking =D

"Very-Berry" Homemade Blueberry Jam Muffin


A Very Berry Homemade Blueberry Jam Muffin that I have created. Love the "jam-ness" inside. Super much JAM! Haha.. I just want to finished the blueberry jam that I  have made.Forgive me that all these posts were not current baking projects. I'm trying to catch up to my blogging now. Be patient with me ya, I appreciate it! =D

Ingredients:
1 egg
60g vegetable oil
60g sugar
100g blueberry jam
1 tbsp baking powder
130g all-purpose flour
50g milk

Steps:
1. Preheat oven to 350 F.
2. Beat egg, sugar and oil till combine.
3. Add in milk and mix.
4. Sift in dry mixture till combine then stop mixing.
5. Scoop in batter into lining baking paper till 1/2 full. Then put one big tablespoon of blueberry jam into the baking cup and swirl it together using a bread knife.
6. Bake for 12-15 minutes or toothpick inserted comes out clean. Leave to cool and enjoy!

This homemade blueberry jam is very healthy and tart. Not at all sweet. It is very different between fresh and frozen blueberries. The fresh ones really give you the tartness and the freshness. So do expect the blueberries jam to leak out its juice into the muffin. Very much indeed.

 See how juicy this muffin is. Don't put too much though. I have been greedy. >.<


Happy baking =)

Friday, September 12, 2014

Baked Red Bean Paste Mooncake (Failed =( )


First attempt to make baked mooncake. Not-very-successful. It lacks of the greasy taste and softness of mooncake. It's a failed attempt I guess. It is not very easy to make baked mooncake. IT is easier to make snowskin mooncake. But, I'm not sure why snowskin mooncake actually worth more in the market. The price is higher! Weird. But, my boyfriend said it is still okay. Just needs improvements. Thus, I'm not sharing nay recipes till improvements is made. Hehe.. Let me make it better so that I can share it with you next time. >.<


I made 9 small pieces only, so luckily I did not waste much. I think I used the wrong syrup for this which makes it tastes weird. Hmmmmm......

However, still blogging about it.

"Failure is the path to success"

=P

Snowskin Mooncake with Red Bean Paste


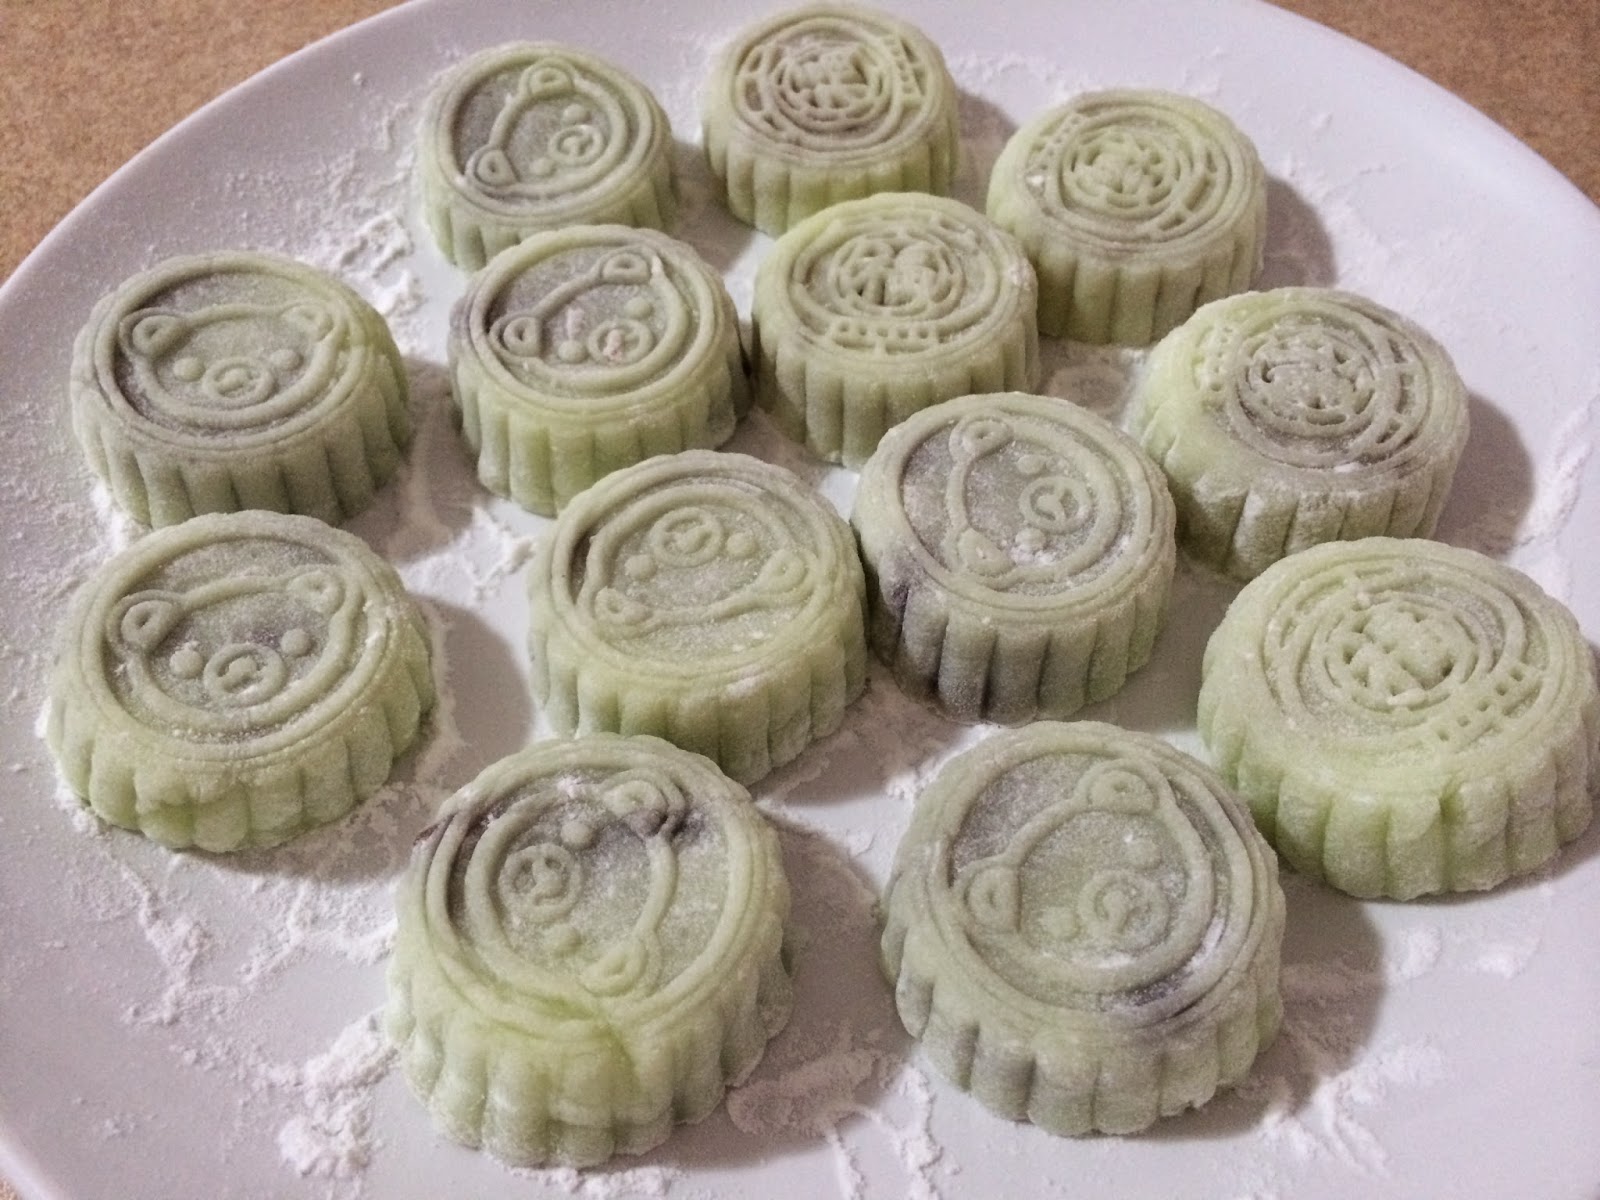
First attempt in trying to make Snowskin Mooncake, and it is a success! I'm a happy girl!
It still needs improvement, but I'm there soon!
The taste and method is correct, just it needs more "refrigerator" time. Remember to put in the fridge for at least 2-3 days before consume, it tastes even better and firm after few days in the fridge. Of course you can eat it right after you make it, it will have the texture of "muachi".


Ingredients:
(adapted from Nasi Lemak Lover)
110g cooked glutinous rice flour (koh fun)
110g powdered sugar
40g vegetable shortening
140g cold water (must be cold water)

colored gel/paste (I use green and pink, the lighter green is pandan extract)

red bean paste


Steps:
1. Mix rice flour and powdered sugar. Rub in the shortening. Add in the cold water and mix with hand till all combined. Put drops of colored gel into the dough after divided them into three portions.
2. Divide them into balls and flatten them. Wrap around paste and make into a ball. Coat with cooked rice flour to prevent sticking to the mold. Use mooncake mold to make shapes. Done!
3. Enjoy! =)


Simple & Easy Banana Cupcake


Another banana recipe again! I made many banana cake recipes because there are always leftover bananas that are only waiting to be thrown away. Also, banana cake is my boyfriend's favorite among most of my baking. He does not even touch the real banana fruit, but if it is made into cake or any other desserts, he loves them. How weird is he!? So I tend to make healthy banana cake recipe for him, omit most of the oil if possible. But, oil makes banana cake YUMMY!

Ingredients:
1 riped banana, mashed
1 egg, beaten
20g vegetable oil
10g sugar (omit this if your banana is super-duper riped; the banana in this form will be very sweet)
80g cake flour
1/2 tsp baking powder

Steps:
Beat in ingredients in this following order. Egg, sugar, oil, mashed banana, cake flour & baking powder. Put into pre-heated oven at 350 F for  12-15 minutes. Cool on wire rack.

You can eat while it's hot, just be careful not to burn your hands, mouth and tongue. LOL. It has a very nice fragrant smell of the banana. The house seriously smells divine! Love it!


Haha, too boring, so I dusted two of the cupcakes with cocoa powder using my snoopy and bear utensils. Lovely!


The inside of the cupcake is really moist and nice. Not very sweet at all, and not oily. Very nice! haha.. I love the "black thing" inside the cupcake. It proves that it is banana cupcake indeed.

Happy baking =)

Microwave Chocolate Banana Cake Doughnuts


Ignore the cupboard, the ketchup bottle, the wooden spoon at the back. My photography skill is yet to be improved. LOL. This is a very cute little treat I made out of a microwave oven. It is actually cake doughnut topped with colored glaze and sprinkles. It tends to harden very quickly since it is made out of a microwave oven. It is delicious when it comes out straight from the microwave oven, very soft. However, tr to consume it within 30 minutes to an hour. It depends on the weather as well. SO try to make in small batches unless you have many to feed.

Ingredients:
90g cake flour
60g milk
30g sugar
1 egg, beaten
15g cocoa powder
1 riped banana, mashed
25g vegetable oil

oil (for coating the mold)
sprinkles
powdered sugar
water
colored gel paste

Steps:
Mix all ingredients together till smooth and runny, and pour into the oil-coated mold. Microwave for 1 to 1 and half minute. Serve while still hot.

***** ALERT! I am using a Daiso Japanese bought product which is made out of microwave safe product. Do not use any aluminium or any NOT microwave safe product in the oven. It will explode. So be very careful! Please look at the instructions before you put anything into the microwave oven or oven!


Sorry for the mess..>.<...

Enjoy baking =)

Whipping Cream Hokkaido Cupcakes

Lately I have been posting photos of the baking projects that I have done in May before the M.I.A period. Forgive me for those lengthy posts in one day. LOL. This is one of the baking project, Hokkaido cupcake that is made with whipping cream and also filled with whipping cream/ topped with whipping cream. It is a sinful treat, since I replaced the milk with whipping cream to make it creamier. >.<

Ingredients:
recipe here
(I replace the milk with whipping cream)

You also can see the big dollop of whipping cream that I piped on top. It is really yummy although I am not a whipped cream lover at all. A little to me is fine. To those who are whipped cream lovers, definitely a treat for you!


Happy Baking!=)

Thursday, September 11, 2014

Lemon Blueberry Yogurt Tiramisu


I have always wanted to try tiramisu with other flavors, and also with yogurt instead of mascarpone. I made it and I am not very happy with the looks of the tiramisu. The taste can be better and sweeter. This tiramisu is a little sour, at least to me. The only pro for this tiramisu is the low fat, low calorie and high in nutrition. I use greek yogurt with fresh lemon and lemon juice, and fresh blueberries. I am thinking it is the freshness of the blueberries that made the tiramisu tasted sour because it is indeed very tart. Next time I will increase the sugar a little so that the taste will not be that sour. Haha... =D

Ingredient:
10-12 ladyfingers (depends on the size of your container)
plain greek yogurt
1 lemon zest + 1 lemon juice
blueberries
50g sugar (use more, maybe 100g sugar)

Steps:
Just prepare ingredients above according to the size of your container, and clean everything before use.Stir the greek yogurt till little runny/smooth. Cook the lemon juice and sugar till dissolve. Let it cool a little. Assemble the tiramisu with ladyfingers soaked lemon syrup, then yogurt, then blueberries, then lemon zest. Repeat till full. Finish with lemon zest. Refrigerate it before eating. Top with extra blueberries before serving, it is optional.


This tiramisu is very tart. If you like sour taste, then this is the one, healthy and fresh!

Happy eating =)

Egg-Free Doraemon & Dorami & Chipmunks Butter Cookies


Sooooooooooo Cute! I love cute stuffs if you have read my blog from the start, then you'll know it. I cannot resist cute things (food, toys, etc), and baking! It is just divine! Doraemon is one of my favorite childhood manga. Making it into cookies just make everything looks better! Chipmunks here is very cute too! Look at the details the cookie cutter made, very nice! Superb! Haha... Forgive my "High-ness" here, too happy, although it is a baking project that I have done in May. No time to post it.

The ingredient and steps are the same as my previous "Elmo" butter cookies. I will put the link here.
Recipe here


Happy baking!

*I will show you my collection of cookie cutter soon. Stay tuned to my blog posts. =)

Hello Kitty Fondant Face Cake

Hello all! I am so sorry for not updating my blog for almost 3 months. I will try to update more posts in the future. =) I have been back to my country and spent precious time with my family, was so happy till almost refused to come back to study. At least foods will help me to stay as happy as I want. =)

Below is a Hello Kitty Face Cake made out of fondant, that I have made for my friend's birthday. She is a Hello Kitty fans, so I thought this cake would be perfect for her. =D

The cake is a basic chocolate sponge cake recipe, or you can use chocolate box cake mix, it is the same. The cake pan is a Hello Kitty cake pan that I bought from Amazon. It is absolutely nice to use, easy and simple. However, be careful when you use this pan, because the edges is kinda sharp. Do not allow your children to go near it. I actually cut myself a little. >.< Then, the fondant is a white vanilla flavored fondant, and I mix the color myself. The yellow nose and red bow is mixed with edible food gel from Wilton. Then, the chocolate whisker and eyes are actually made from cocoa powder+fondant. It is like building a clay toy, very easy and fun. It is just that time is needed to do this. Patience is needed.


The cardboard is a DIY from cereal box. I'm so happy that I actually create a cake board from the recycle items.

Happy baking =)